Running TurboGears under AppEngine
This recipe describes how to create a minimal mode TurboGears application under Google AppEngine.
Step 0: Install AppEngine
Install the AppEngine SDK from https://developers.google.com/appengine/downloads#Google_App_Engine_SDK_for_Python The following guide uses the AppEngine SDK for OSX.
Step 1: Create Application
First required step is to create an AppEngine application, this can easily be done through the AppEngine SDK.
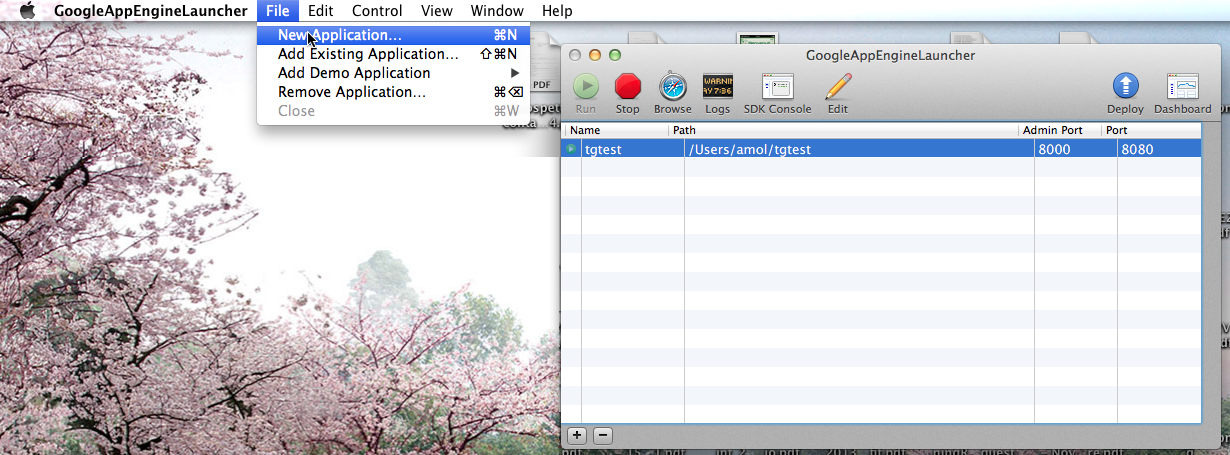
If you are not using the AppEngine SDK for OSX please refer to the AppEngine Documentation to create a new application.
This will create a new application in the specified directory with the following files:
$ tree
.
├── app.yaml
├── favicon.ico
├── index.yaml
└── main.py
By default the created application relies on the Webapp2 framework,
to remove this dependency edit the app.yaml file and delete the
following part:
libraries:
- name: webapp2
  version: "2.5.2"
Step 2: Setup Dependencies
On AppEngine, all the dependencies of you application should be provided with the application itself. This makes so that we are required to install TurboGears inside the application directory.
Supposing your application is named tgtest and you created it in your HOME,
to do so we first need to create a temporary virtual environment we will throw
away when everything is installed:
$ cd ~/tgtest
$ virtualenv --no-site-packages tmpenv
New python executable in tmpenv/bin/python
Installing setuptools............done.
Installing pip...............done.
Note
Depending on your virtualenv command version, the --no-site-packages option
might not be required.
Now will enable the virtualenv and install the TurboGears2 dependency, only
difference is that instead of installing it inside the virtual environment itself
we will tell pip to install it inside the packages directory of our application:
. tmpenv/bin/activate
(tmpenv)$ pip install -t packages -I TurboGears2
As AppEngine doesn’t provide setuptools the last required step is to also
provide setuptools inside our packages directory:
(tmpenv)$ pip install -t packages -I setuptools
Note
Please note the -I option to force pip ignoring the currently installed packages.
Now all the required dependencies are installed inside the packages directory
and our virtual environment can be deleted:
(tmpenv)$ deactivate
$ rm -r tmpenv
Step 3: The TurboGears Application
Now we can proceed editing the main.py file which is started by
AppEngine to run our application and actually write a TurboGears application there.
The first required step is to tell python to load our dependencies from
the packages directory inside our application. So at the begin of
your main.py, right after the leading comment, add the following lines:
import os
import site
site.addsitedir(os.path.join(os.path.dirname(__file__), 'packages'))
Then, inside the main.py file, after the site.addsitedir line,
you can create the actual WSGI application which must be named app
for AppEngine to serve it:
from tg import expose, TGController, MinimalApplicationConfigurator

class RootController(TGController):
     @expose()
     def index(self):
         return "<h1>Hello World</h1>"

config = MinimalApplicationConfigurator()
config.update_blueprint({
    'root_controller': RootController()
})
app = config.make_wsgi_app()
Step 4: Start The Application
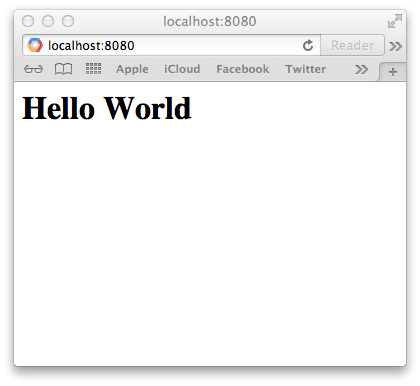
Now that the application is ready, we can start it from the GoogleAppEngineLauncher
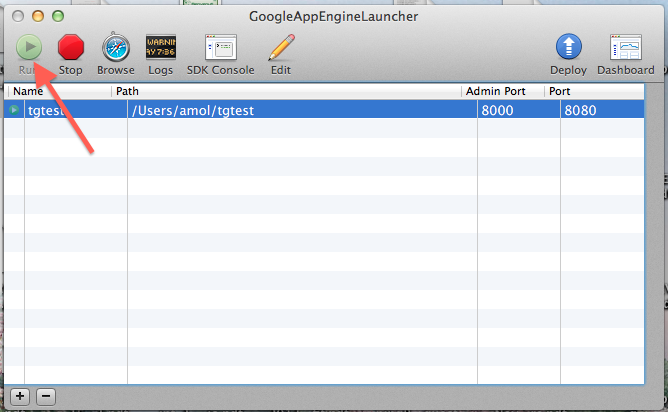
and point our browser to http://localhost:8080 to get its output
Note
if something went wrong, you can press the Logs button and check
the application output.
Step 5: Deploy It!
Now that your application is correctly running locally, it’s time to send it to Google servers.
First required step, is to let google know that our application exists.
To do so, point your browser to https://appengine.google.com/ and
press the Create Application button to create a new application.
Once you created your application and have a valid Application Identifier
available, edit the app.yaml file inside tgtest to set the correct
identifier:
application: turbogearstest
Note
replace turbogearstest with your own app identifier.
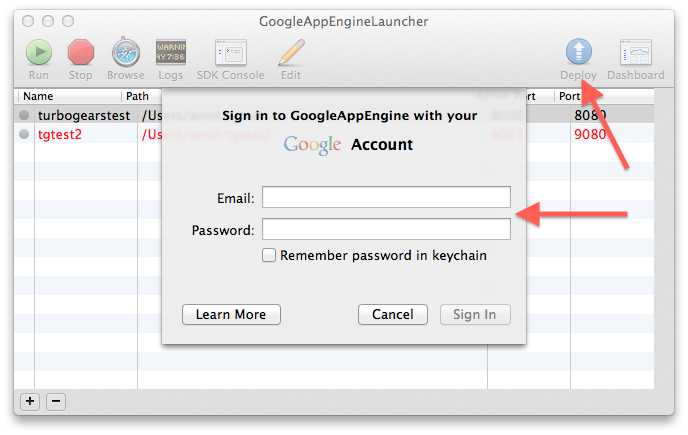
Now get back to the GoogleAppEngineLauncher and press the Deploy button. It will ask for your google account credentials, and will then proceeed with the deploy.
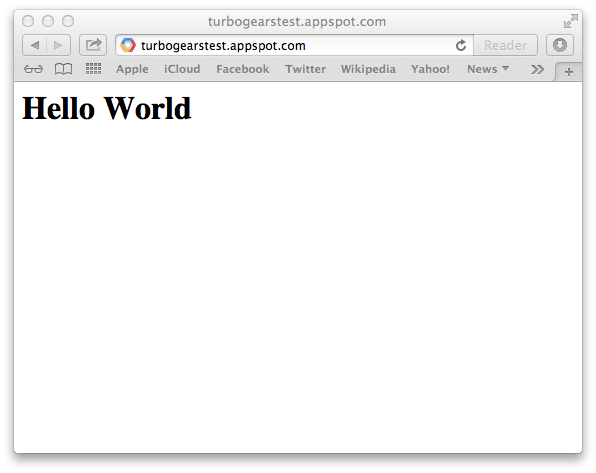
As soon as it finished the deploy, your application will be available online
at the reserved URL. Which is in the form APPID.appspot.com, in our example
we can point the browser to http://turbogearstest.appspot.com and get
our application output.